On the website you can create and send a tax invoice to a client.
Step 1
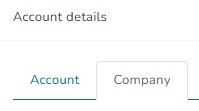
The first thing you need to do is to enter your financial institution account deposit details in your Company profile on the website.
On your home page go to Account details > Company:
Navigate down the page and complete the following financial institution account deposit details:

For example:

To save your account deposit details <click> 
You will automatically return to your home page and receive the following confirmation:

Step 2
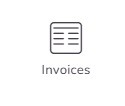
To create and send a new invoice or manage existing invoices, on your web page <click> on the Invoices module:
The following page opens:

Step 3
To create a new tax invoice <click> on: 
The following page opens:
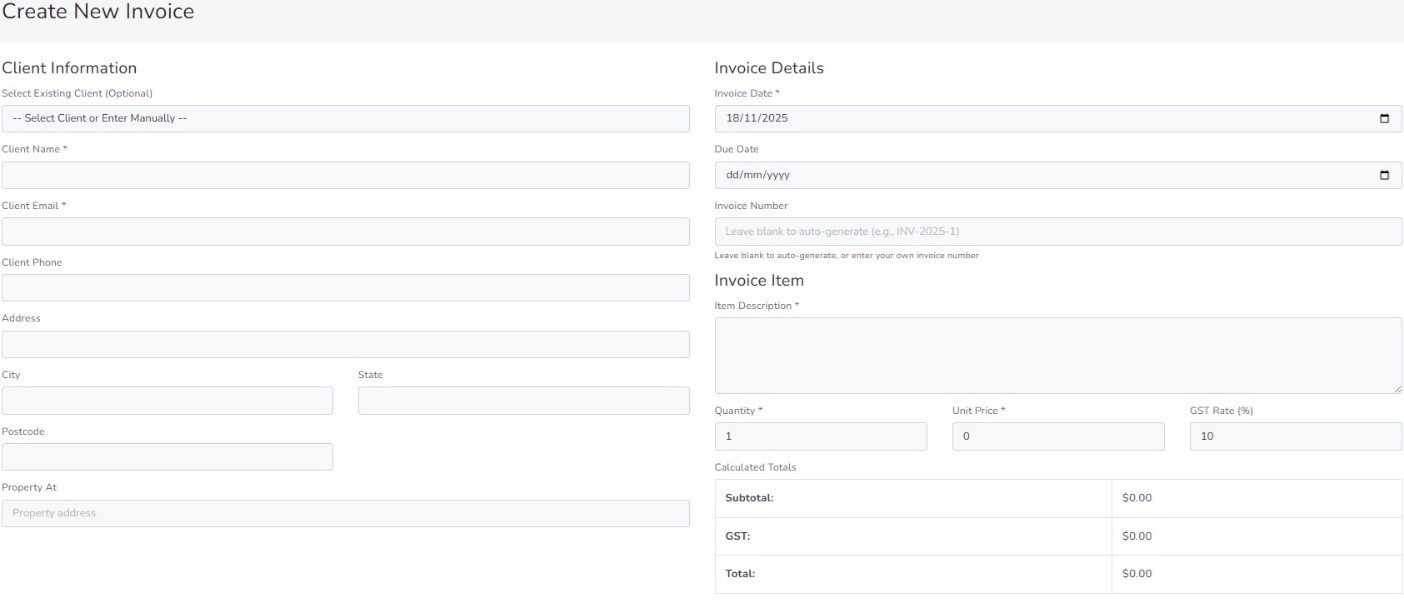
Follow the instructions and complete all relevant fields on the page to create a tax invoice.
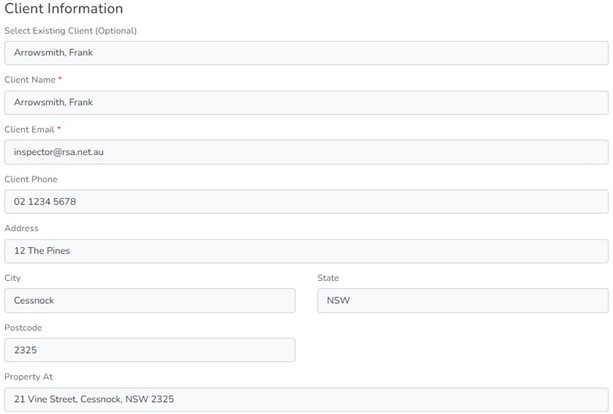
On the left-hand side of the page complete the Client Information section.
If you select an existing client, many of the fields will auto generate.
If the ‘Property At’ is the same address as the Client, type “As above”.
The following is an example of completed fields for the Client Information section:
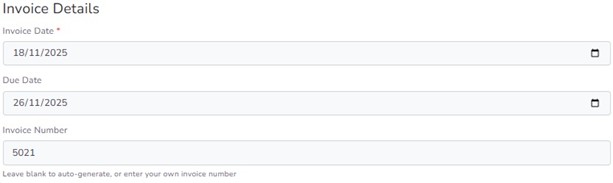
Then on the right-hand side of the page complete the Invoice Details section.
You have an option for the Invoice Number to auto-generate or you can chhose to insert your own customised invoice number.
The following is an example of completed fields for Invoice Details:
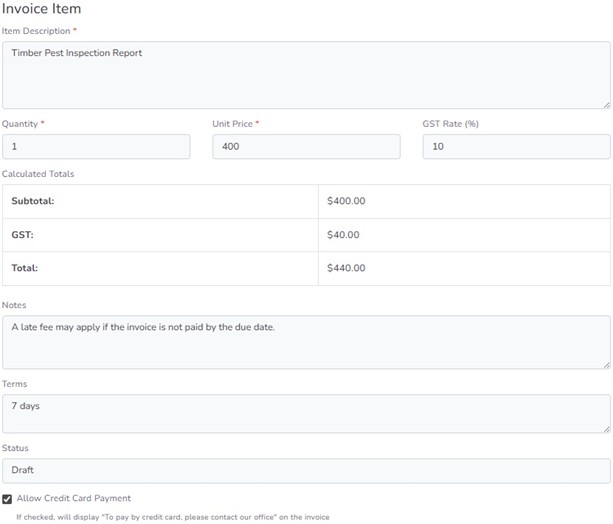
Also on the right-hand side of the page complete the Invoice Item fields.
The GST Rate (%) defaut is 10%, but this can be be varied, if for example, the work is excempt from GST, the GST Rate can changed to “0%”.
It is important to enter the Unit Price of doing work without a GST component. When the Unit Price is entered, the Calculated Totals will auto-generate.
The following is an example of completed fields for Invoice Item:
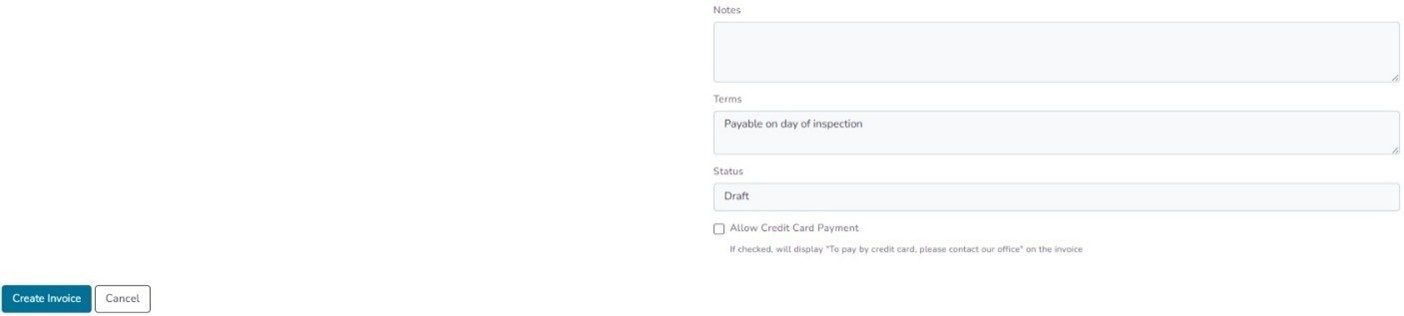
When you have completed all the fields, to create a DRAFT tax invoice <click> 
A page will open indicating that the DRAFT invoice has been successfully created.
The information needs to be carefully checked to make sure the inputs are correct.
The following is an example of completed fields for a DRAFT invoice:
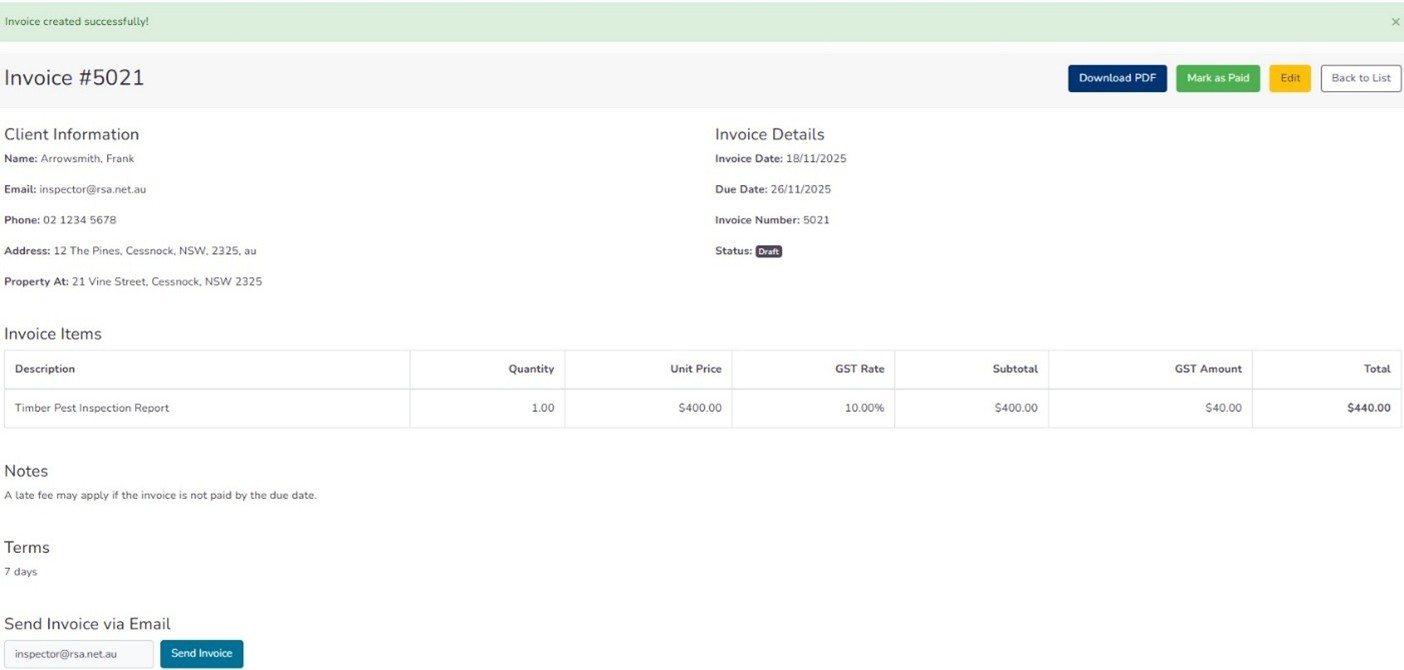
At this stage, the invoice is only a draft, and the following actions can be taken including editing, if required.

It is then recommended that you view the completed Invoice by <clicking> 
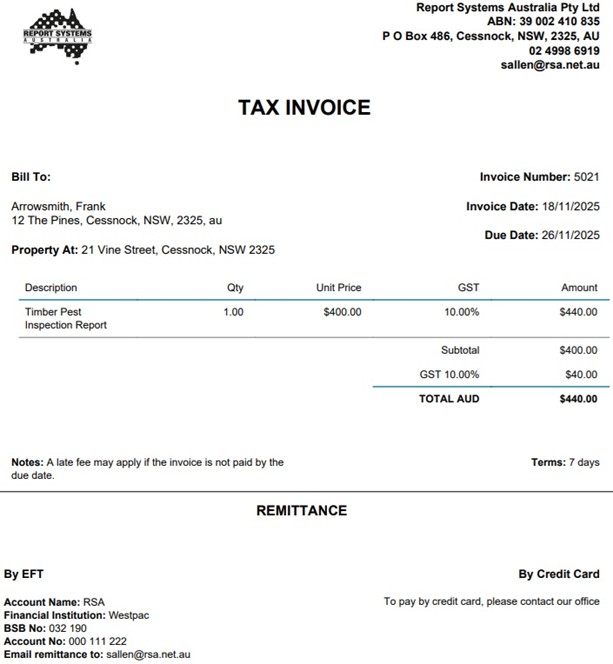
The following is an example of an Invoice PDF:
The Invoice will auto-save as a DRAFT (to be sent later) by <clicking> 
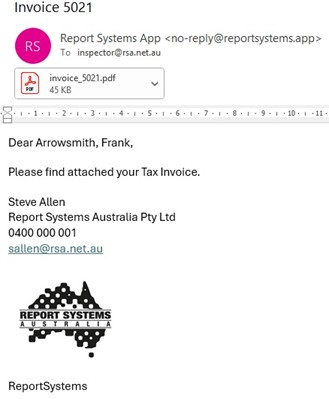
Alternatively, the Invoice can be emailed to the Client now by <clicking> the ‘Send Invoice’ option:

When the Invoice is sent, the Client will receive the following (example) email notification:
When the Invoice is sent, your webpage will be updated to (for example):

To view and manage your Invoices <click> 
Step 4
Your list of Invoices page allows you to edit and search for existing invoices.
The list of Invoices page shows the following information relating to each invoice created: Invoice Number; Client Name; Date of Invoice; Due Date of Invoice; Item (a description of the goods/services provided); Total ($ amount of the invoice including any GST); Status (whether the invoice is a draft or has been sent or has been paid or is overdue); and Actions (that you can take to manage a particular invoice).
Note. An invoice is automatically listed as Overdue when the Due Date has passed and it hasn't yet been marked as Paid by you.
The following is an example of a list of Invoices page:
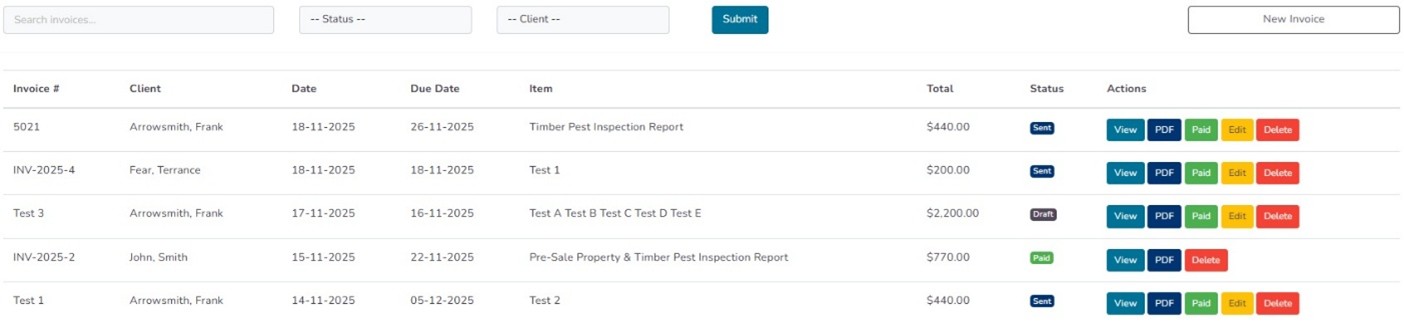
The top fields on the left-hand side of the page allows you to search for an existing individual Invoice or group of invoices by: Invoice Number or Status or Client Name.
The Actions contain the following functions that allow you to manage a particular invoice:

The following individual actions can be taken:
<Click> on  to review the contents of an Invoice and to email an invoice to the client (if the invoice has not already been sent).
<Click> on  to view the completed Invoice or to print an invoice.
<Click> on  when the invoice has been paid in full by the client.
<Click> on  to update and resend an invoice.
<Click> on  to permanently delete an invoice.